Wednesday, December 31, 2014

Blue, gold and a bow

Hi everyone!

My backlog continues as this post features my nails from last month. I've been hanging onto the 3D blue bows for quite some time without an occasion to wear some blinged up nails. Well, the occasion never came, but I still wanted to wear them, so I paired the bow up with some gold and blue :) I chose OPI Can't find my Czechbook and Orly Bling to match the bow and also added a gold stud on my pinky to complete the look.

blue, gold and a bow

blue, gold and a bow

blue, gold and a bow

I'm off to prepare for my New Year's Eve party tonight now. Have a wonderful time with family and friends, and I'll catch you in 2015!

Thanks for reading.
~Sharon

Read more…

Tuesday, December 30, 2014

Orly Saturated and OPI Servin' Up Sparkle

Hi there!

It's almost the end of 2014 and I still have a huge backlog of photos to post from this year! Coincidently, today's look kind of fits in with the Near Year's Eve feel with the glitter sparkle :) Iused Orly Saturated for the base purple and OPI Servin' up sparkle for the glitter gradient.

saturated with servin up sparkle

saturated with servin up sparkle

Stay tuned for a few more posts before the New Year! :)

Thanks for reading.
~Sharon

Read more…

Monday, December 29, 2014

Christmas nails 2014

Hello everyone.

Here is my belated post sharing what I wore for Christmas this year. In fact, I was in the mood for some detailed freehand nail art (detailed in my terms, of course!) so I went with painting on a nativity scene!

I found Jacki from Adventures in Acetone's gorgeous creation and just had to try it myself. I would have loved to have added some camels and wise men, but this alone took me over an hour for one hand...oops. Should have planned my time better since I needed to sleep! ;)

christmas nativity

I created a gradient with OPI Incognito in Sausalito and OPI Keeping Suzi at bay. I then added a coat of Glitter Gal Galaxy holo top coat for the sparkle. The nail art was done using acrylic paint.

christmas nativity

christmas nativity

I'm quite proud of how this turned out despite the wobbly freehand! How did you pass your Christmas day and what did you wear on your nails?

Thanks for reading!

~Sharon

Read more…

Tuesday, December 23, 2014

An Enchanting Christmas tree

Hi everyone :)

I can't believe it's only 2 more days until Christmas - where has 2014 gone?! As usual, I'm not one for themed nail art ideas, but I couldn't pass up a cute dotted Christmas tree look using my very own Picture Polish Enchanting.

I started with two coats of Enchanting on my index and ring finger. I then created the scaled gradient with Picture Polish Kryptonite on my ring finger using a tutorial by @simplynailogical's. The gorgeous silver holographic is Orly Mirrorball and the Christmas tree is made up of Enchanting and Kryptonite.

green gradient for christmas

green gradient for christmas

green gradient for christmas

green gradient for christmas

green gradient for christmas

Loving the simplicity of this look, although the scaled gradient did require a little more effort :P Definitely worth it though!

What Christmas looks have you created for the season?

Thanks for reading!
~Sharon

Read more…

Thursday, December 18, 2014

Going bonkers for swagger

Hey everyone.

Here is a simple skittle look using the lovely crèmes from Picture Polish in Bonkers and Swagger. I paired the shades with a more neutral silver shade to even out the pop of colours :) The silver is OPI Turn on the haute light and the glitter is OPI Servin' up sparkle.

bonkers and swagger

bonkers and swagger

Thanks for dropping by.
~Sharon

Read more…

Saturday, December 13, 2014

Mix & match cheetah print

Hi ladies!

OPI Do you have this color in Stockholm is a lovely saturated purple I just had to wear! I paired it with some OPI Need sunglasses? and Orly Bling for the well...bling holographic goodness I can't seem to get enough of!

yellow & purple skittle

yellow & purple skittle

yellow & purple skittle

I added some cheetah print to match the bling level of Bling ;)

Thanks for reading!
~Sharon

Read more…

Wednesday, December 10, 2014

A-England Saint George

Hello hello :)

After the amazing holographic Orly Mirrorball, I was still quite in the mood to stare at more holographic goodness, so I pulled out A-England Saint George. It's not the most holographic polish I own - actually it's a lot more subtle in comparison to other shades - but it's a beautiful shade of dark green ♥

saint george

saint george

Thanks for reading.
~Sharon

Read more…

Saturday, December 6, 2014

Swatches & review: Orly Mirrorball

Hi everyone!

As with most nail polish brands, Orly has come out with a Holiday collection and it contains a STELLAR shade (if I do say so myself). Mirrorball is an amazing silver holographic glitter, densely packed and completely opaque in three coats.

mirrorball

mirrorball

And even under indirect light, the holographic goodness still comes out to play.

mirrorball

mirrorball

Have you picked up this beautiful shade yet?

Thanks for reading.
~Sharon

Read more…

Wednesday, December 3, 2014

Ulta3 Corsican rose

Hello everyone.

Here is a quick post featuring Ulta3 Corsican rose layered with a Sweet Color W001. The layering is subtle, but I think it suits the pastel mint green shade :)

corsican rose with flakey

Thanks for dropping by!
~Sharon

Read more…

Monday, December 1, 2014

Swatches & review: My own Picture Polish Enchanting collaboration shade!

Hi ladies!

You have no idea how excited I am to be sharing this with you ^^ This is a secret I have been keeping for the past year and I am finally able to reveal it!

To be honest, I wasn't sure of what shade to go with at first when I was initially asked to be a part of a Picture Polish Collaboration release. I really wanted to create a purple shade because well...I adore purple! Picture Polish already has heaps of nail polishes in this colour though. Then I wanted to create a shade to reflect the beauty of Hong Kong, my home country, and slowly the final product was formed.

Picture Polish Enchanting has a holographic finish in a bright, medium green shade. Whilst the lush and lesser-known nature of Hong Kong was my inspiration, I felt a brighter shade of the colour would work better in nail polish form and be more wearable. The girls at Picture Polish did a really good job translating my envisioned shade into reality, with it being just a tinge brighter than I expected. I love it all the same though! ♥

Picture Polish Enchanting_collaboration with Polish Infatuated

When I hear people talk about Hong Kong, it usually revolves around the hustle and bustle of the city. I want to draw attention to the gorgeous natural landscape of the outer districts, to a more serene, quieter and just as Enchanting environment.

Picture Polish Enchanting_collaboration with Polish Infatuated

Picture Polish Enchanting_collaboration with Polish Infatuated

I also tried my hand at putting together a collage of Enchanting, inspired by @lakodom on Instagram. It's in no way as beautiful as the ones she puts together, but I still wanted to show off the inspiration behind my shade.

Picture Polish Enchanting collage

It's been such a privilege working with the ladies and brains behind Picture Polish. It really is a dream come true to have a shade I helped come up with launching on the website. I really hope you will all love Enchanting as much as I do! :)

Picture Polish Enchanting is now available at www.picturepolish.com.au.

Thanks for reading!
~Sharon

Read more…

Thursday, November 27, 2014

Purple, with a sprinkling of gold & glitter

Hi everyone.

I pulled out my favourite colour to wear the other day and decided to mix in a little bit of gold and glitter into the final look.

OPI Do you lilac it was used as the main purple. Nicole by OPI Inner sparkle, Hello Kitty Golden girl and A-England Princess Tears were added to complement the shade :)

purple skittle

purple skittle

Do you skittle often? What's your favourite colour to play with?

Thanks for reading.
~Sharon

Read more…

Sunday, November 23, 2014

OPI Sheer Tint rainbow

Hello everyone.

OPI Sheer Tints seemed to receive a lot of mixed reviews earlier this year and to be honest, my initial experience with them wasn't too great either. Still, they're tints and I wanted to play with some colour so I pulled them out and gave them another chance. I layered the shades over Ulta3 Lily white and overlapped them so that they would mix and form other colours too.

I finished it with a coat of OPI Which is witch.

sheer tint rainbow

sheer tint rainbow

Do you own the Sheer tints? What are your thoughts on them?

Thanks for reading!
~Sharon

Read more…

Friday, November 21, 2014

A Czech Milky Way

Hi there :)

Here is a layering using one of my favourite glitters - Alanna Renee Milky way over my favourite blue OPI Can't find my Czechbook. Needless to say, it's a gorgeous combination ♥

can't find my czechbook layered with milky way

can't find my czechbook layered with milky way

Thanks for reading!
~Sharon

Read more…

Wednesday, November 19, 2014

Ulta3 Hearts Desire paired with Ozotic 906

Hi everyone.

I put together a simple layered look using Ulta3 Hearts desire and Ozotic 906 a while back since I lacked inspiration for my nails. It looks pretty and I kind of regret not trying it with a matte top coat over it!

hearts desire with 906

hearts desire with 906

Thank you for stopping by.
~Sharon

Read more…

Saturday, November 15, 2014

Swatches and review: Kitty Got Claws

Hi everyone!

Today, I have a new-to-me brand to share with you all. Kitty Got Claws is an Australian brand established by Deana Sarwari, who says:

"Our nail polishes are quick drying, chip resistant, non yellowing, high gloss finish, UV protected, easy to apply, suitable for vegans."

That's a rather huge claim, so let's see if the nail polishes live up to the description!


First up is 
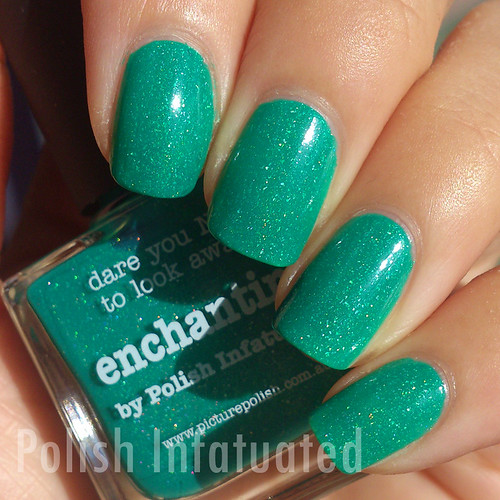
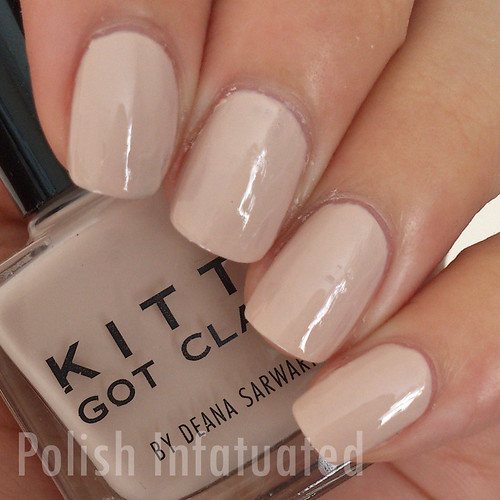
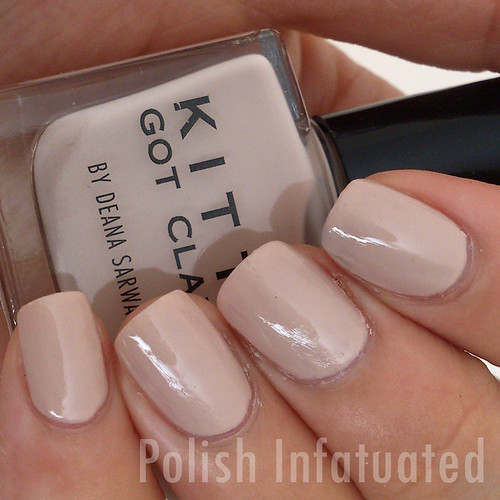
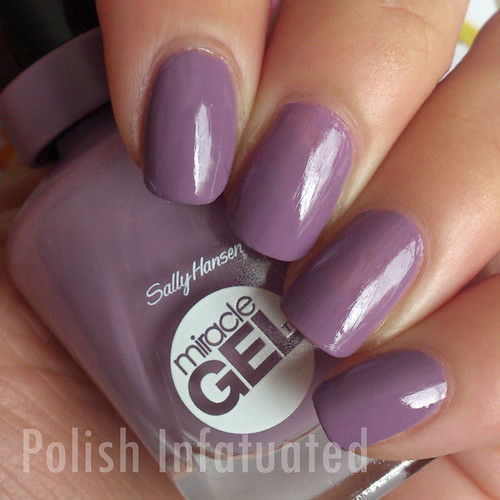
Bridal waltz, a beautiful light taupe fit for any occasion. I'm a huge fan of neutral looking nails at the moment so this one is a welcome addition to my stash. Bridal waltz has an easy formula to work with, meaning flawless application. I reached opacity in two coats.

bridal waltz

bridal waltz

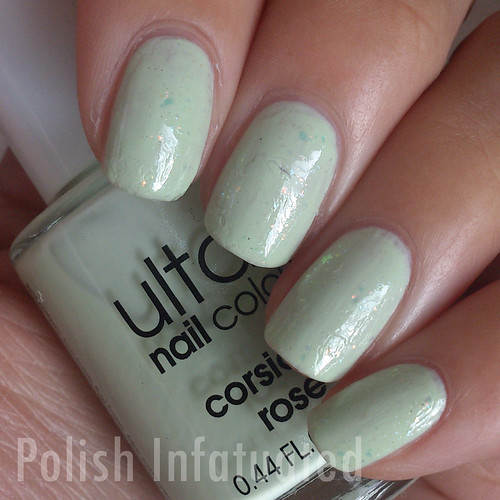
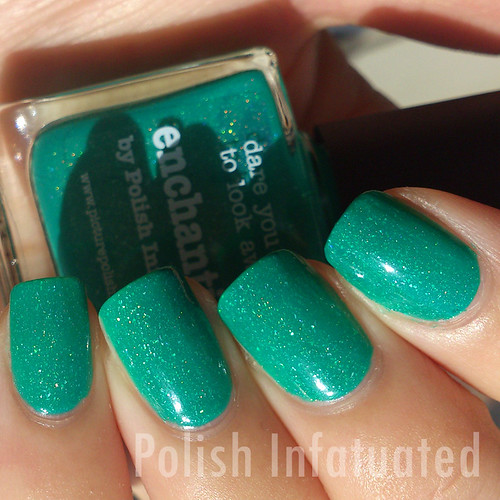
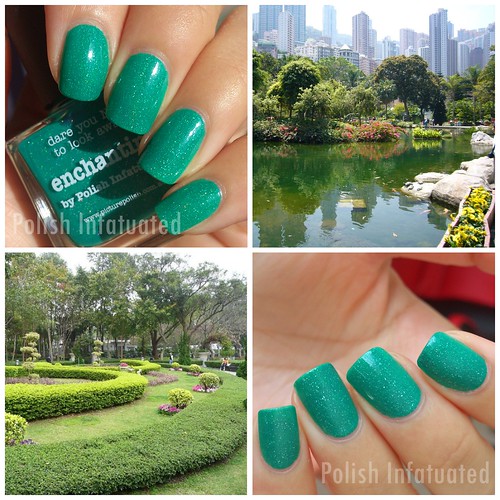
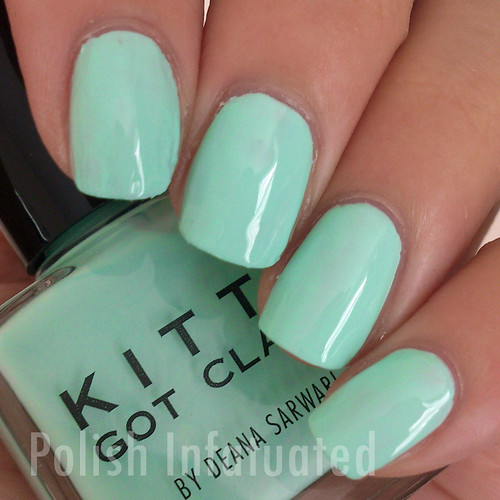
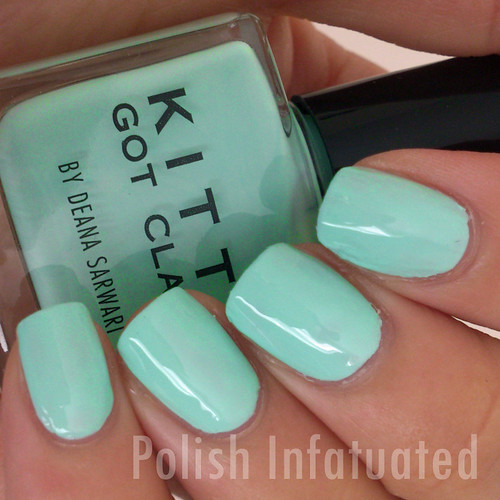
Day dreamer is a bright mint crème which is just so fitting for the Spring and Summer months here in Australia! I found it a little harder to work with this polish, but was able to apply two thicker coats. A top coat helped even out the finish.

day dreamer

day dreamer

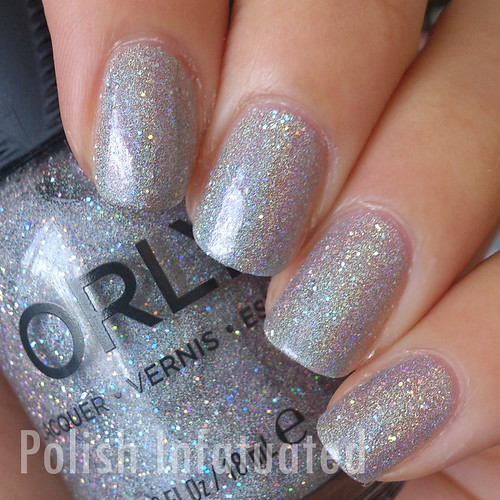
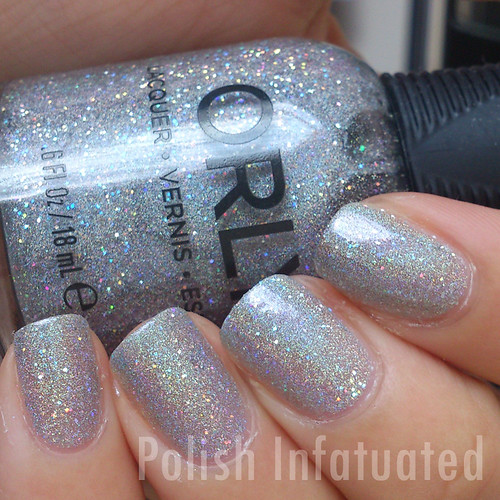
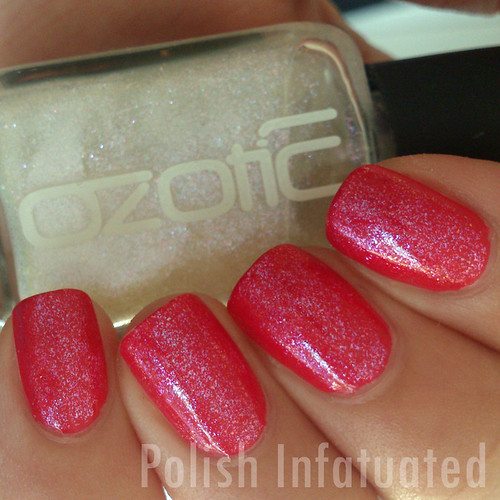
Meow was the problem child of the three nail polishes I tried. I found the formula hard to work with and it was still a little streaky even after three coats. Top coat definitely helped even out the overall finish though. Meow has a lovely silver shimmer which is unfortunately more apparent in the bottle than on the nail and in photos.

meow

meow

For the three polishes, I sealed it all in with Kitty Got Claws Instant Crystal Top Coat. It's not a fast drying top coat and not the shiniest one I own, but it does a decent job at evening out the nail polishes. I've also used it over an OPI nail polish, but found the wear time average, with tip wear apparent by day two. Despite the quick tip wear though, there was no chipping in the three days I had the manicure before changing it up.

In terms of aesthetics, I am a huge fan of the bottle shape and it's similar to the Picture Polish one except with a glossy bottle lid. It's compact and very easy to store - I just wish all nail polish bottles were this easy to sort and put away! The minimalistic appearance of the bottle helps draw attention straight to the shade and the nail polish name and ingredients can be found on the bottom of the bottle.

Kitty Got Claws retails for $23 and the top coat for $25 at bottle. You can purchase the nail polishes at the website. For international ladies, check out the international tab.

What do you think of these nail polishes? Are you eyeing any and putting them onto your wishlist?

Thanks for reading.
~Sharon
Products provided for consideration.

Read more…

Thursday, November 13, 2014

Sally Hansen Miracle Gel Pinky Promise & Get Mod

Hey everyone! :)

Here is a look I put together using Sally Hansen Miracle Gel Pinky promise and Get mod. A very simple skittle look, which I wore on a 3 day trip. I was very impressed with the wear since I expected some chipping. The most I got was a little bit of cracking on my third day of the trip (5 days into the manicure though!).

pink and white gradient

pink and white gradient

I think I've learnt how to use the gel top coat properly now since it didn't take long for my entire manicure to dry and saw how well it held up even when I was more active with my hands.

Thanks for reading.
~Sharon
Products provided for consideration.

Read more…

Saturday, November 8, 2014

Sally Hansen Miracle Gel - B Girl & Street Flair

Hi everyone!

Here is the second post featuring two shades from Sally Hansen's Miracle Gel. I decided to go with a nail art look and created a skittle using Be girl and Street flair. I found the top coat dried quicker this time because I was more aware of needing to expose it to natural UV light :P My nails were totally dry under 10 minutes!

purple and aqua gel chevron

purple and aqua gel chevron

I found the two shades complemented quite nicely and was pretty happy with this look :)

Thanks for reading.
~Sharon
Products provided for consideration.

Read more…

Thursday, November 6, 2014

Swatches & review: Sally Hansen Miracle Gel in Street Flair

Hello everyone :)

So Sally Hansen's Miracle Gel may be old news now, but here are my thoughts on Street flair anyway. A few months back, the Miracle Gel line was launched in Australia, with the selling point being the ease of removing normal nail polish, but the lasting power of gel nail polish. I have a three part post featuring some looks using a few of the nail polishes, so stay turned for my review of its lasting power!

Today's post  features a simple nail of the day look using Street flair, a dusty purple shade. It's not only purple, but also my favourite shade of purple, so it was only right for me to try this polish on first ;)

I applied two coats and then sealed it with the gel top coat (also part of the Miracle Gel range), which dries and hardens under natural UV light.

street flair

street flair

I have to admit, I wasn't used to the slower* drying time, but that may be because it was my first time using the gel top coat. I'd say the manicure was completely dry in 15-20 minutes. Maybe I should have had brighter lighting instead of sitting in the dim lighting and watching a movie!

For a first time user though, it was pretty simple and straightforward. Stay tuned for the next couple of posts!

Thanks for reading.
~Sharon

*by slower, I am comparing it to quick dry top coats such as Dazzle Dry Quick Dry Top Coat and Cult Nails Wicked Fast.

Product provided for consideration.

Read more…

Related Posts Plugin for WordPress, Blogger...