Showing posts with label Picture Polish. Show all posts

Tuesday, December 23, 2014

An Enchanting Christmas tree

Hi everyone :)

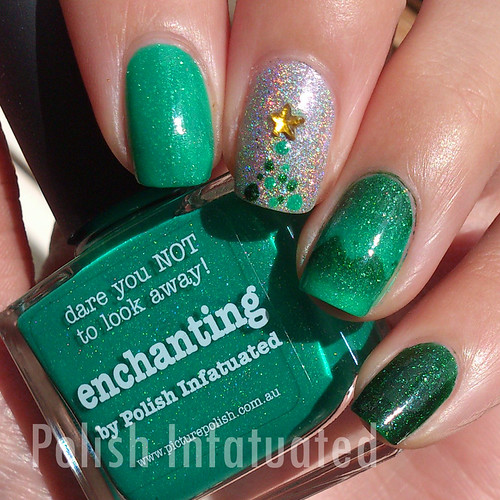
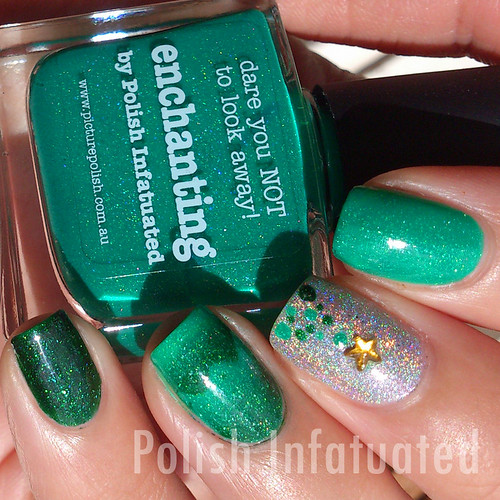
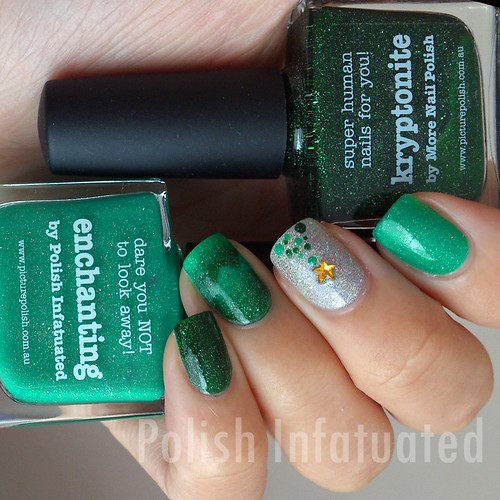
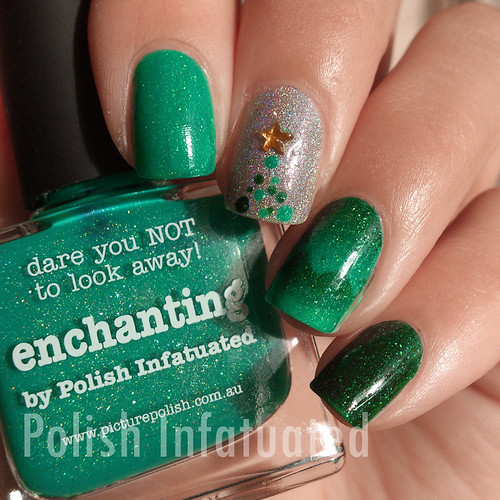
I can't believe it's only 2 more days until Christmas - where has 2014 gone?! As usual, I'm not one for themed nail art ideas, but I couldn't pass up a cute dotted Christmas tree look using my very own Picture Polish Enchanting.

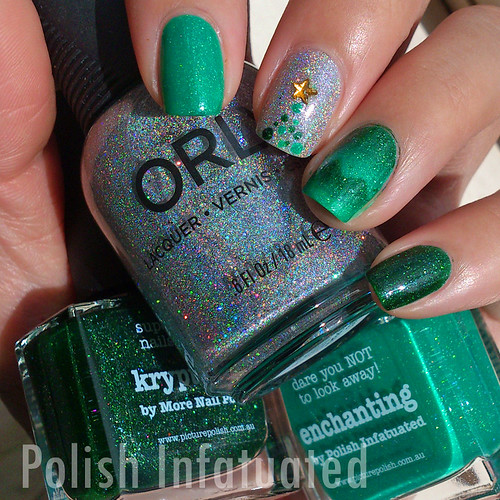
I started with two coats of Enchanting on my index and ring finger. I then created the scaled gradient with Picture Polish Kryptonite on my ring finger using a tutorial by @simplynailogical's. The gorgeous silver holographic is Orly Mirrorball and the Christmas tree is made up of Enchanting and Kryptonite.

green gradient for christmas

green gradient for christmas

green gradient for christmas

green gradient for christmas

green gradient for christmas

Loving the simplicity of this look, although the scaled gradient did require a little more effort :P Definitely worth it though!

What Christmas looks have you created for the season?

Thanks for reading!
~Sharon

Read more…

Thursday, December 18, 2014

Going bonkers for swagger

Hey everyone.

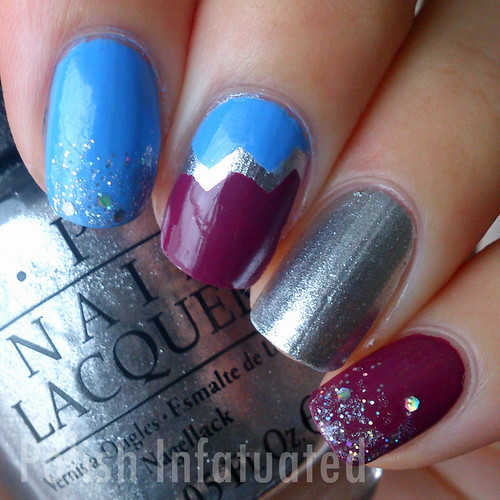
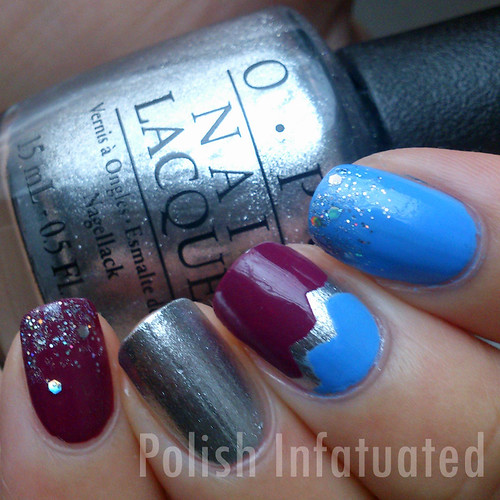
Here is a simple skittle look using the lovely crèmes from Picture Polish in Bonkers and Swagger. I paired the shades with a more neutral silver shade to even out the pop of colours :) The silver is OPI Turn on the haute light and the glitter is OPI Servin' up sparkle.

bonkers and swagger

bonkers and swagger

Thanks for dropping by.
~Sharon

Read more…

Monday, December 1, 2014

Swatches & review: My own Picture Polish Enchanting collaboration shade!

Hi ladies!

You have no idea how excited I am to be sharing this with you ^^ This is a secret I have been keeping for the past year and I am finally able to reveal it!

To be honest, I wasn't sure of what shade to go with at first when I was initially asked to be a part of a Picture Polish Collaboration release. I really wanted to create a purple shade because well...I adore purple! Picture Polish already has heaps of nail polishes in this colour though. Then I wanted to create a shade to reflect the beauty of Hong Kong, my home country, and slowly the final product was formed.

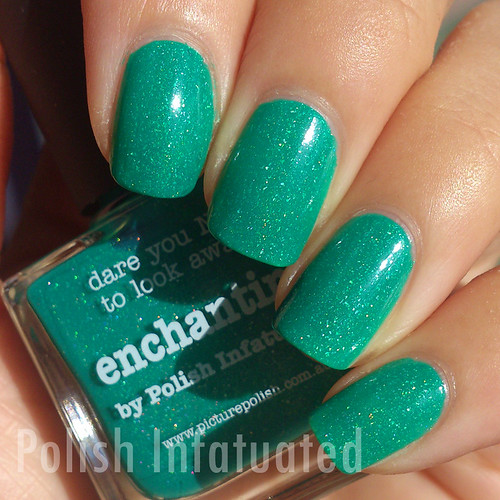
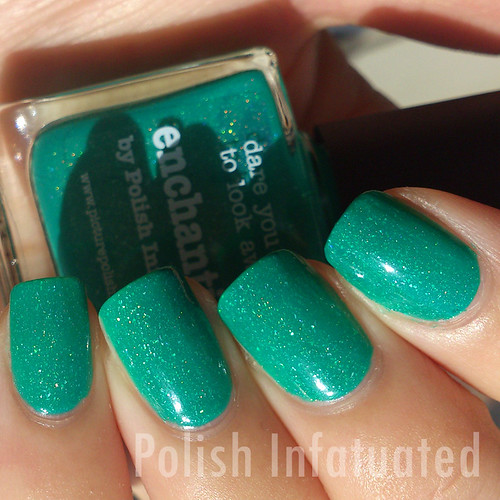
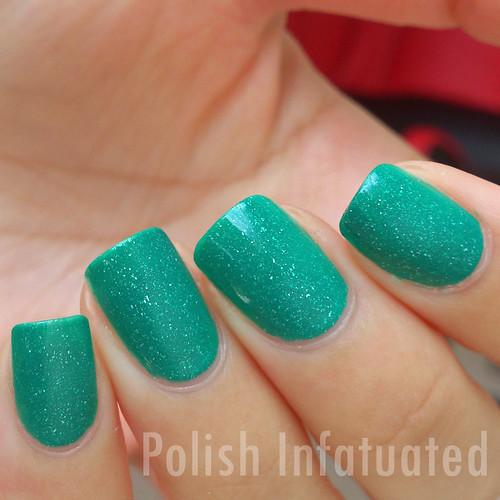
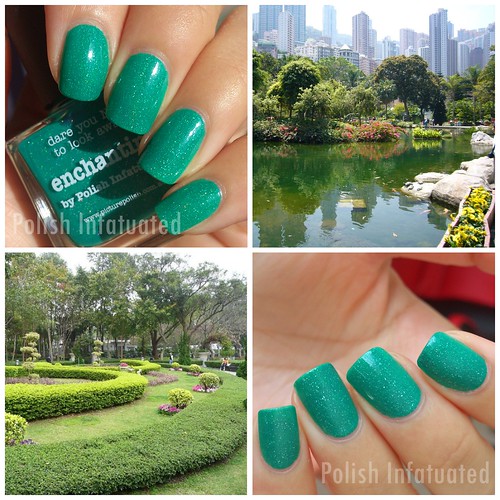
Picture Polish Enchanting has a holographic finish in a bright, medium green shade. Whilst the lush and lesser-known nature of Hong Kong was my inspiration, I felt a brighter shade of the colour would work better in nail polish form and be more wearable. The girls at Picture Polish did a really good job translating my envisioned shade into reality, with it being just a tinge brighter than I expected. I love it all the same though! ♥

Picture Polish Enchanting_collaboration with Polish Infatuated

When I hear people talk about Hong Kong, it usually revolves around the hustle and bustle of the city. I want to draw attention to the gorgeous natural landscape of the outer districts, to a more serene, quieter and just as Enchanting environment.

Picture Polish Enchanting_collaboration with Polish Infatuated

Picture Polish Enchanting_collaboration with Polish Infatuated

I also tried my hand at putting together a collage of Enchanting, inspired by @lakodom on Instagram. It's in no way as beautiful as the ones she puts together, but I still wanted to show off the inspiration behind my shade.

Picture Polish Enchanting collage

It's been such a privilege working with the ladies and brains behind Picture Polish. It really is a dream come true to have a shade I helped come up with launching on the website. I really hope you will all love Enchanting as much as I do! :)

Picture Polish Enchanting is now available at www.picturepolish.com.au.

Thanks for reading!
~Sharon

Read more…

Monday, August 25, 2014

Picture Polish Blog Fest 2014!

Hello everyone :) I have the distinct pleasure and honour to be a part of Australian company Picture Polish's annual Blog Fest - a day where nail bloggers post about the beautiful Picture Polish nail polishes. This year, the event has  expanded to the instagram platform as well, so you may be seeing a number of photos which are dedicated towards this today!


The blog fest post is split into two parts - Part 1 will feature a Picture Polish shade and Part 2 will reveal a nail art creation using two nail polishes and nail vinyls.

Part 1:

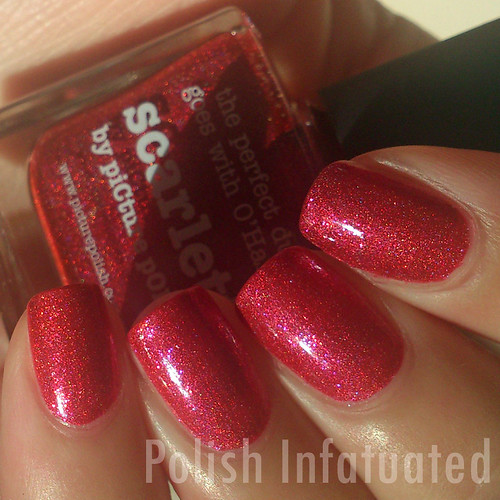
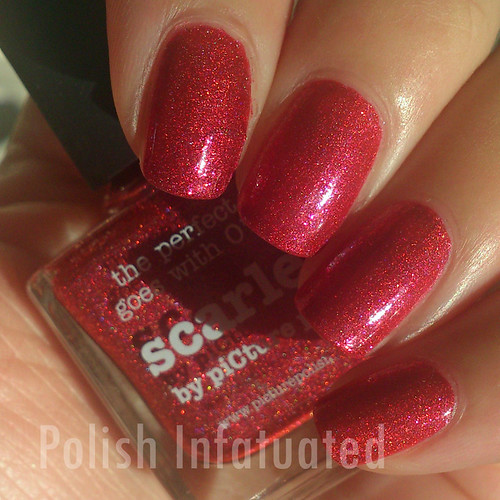
Picture Polish Scarlett is a gorgeous red holographic nail polish. It flowed easily onto my nails and was opaque in two coats. There's really nothing more to say about this besides to run and get yourself your own Scarlett! Such a beautiful red ♥

scarlett

scarlett

Part 2:

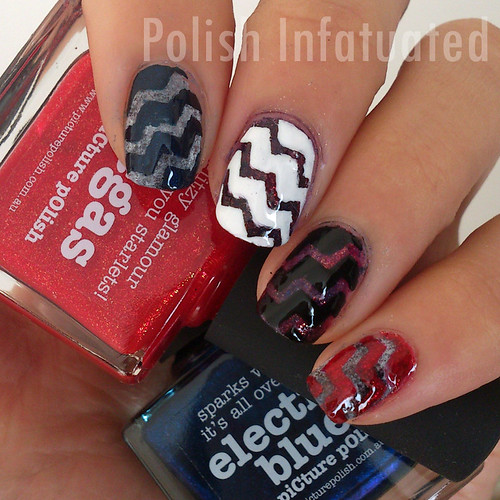
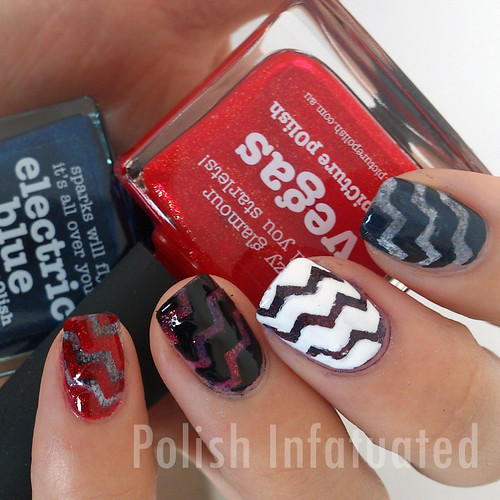
Vegas and Electric blue were the stars of this chevron nail art look.

On my ring and middle nails, I sponged on the two shades. Once the base was dry, I took some mini chevron nail vinyls and stuck them on top, before applying black and white onto each nail respectively and then peeling off the vinyls. For my pinky and index nails, I reversed the look, sponging on black and white as the base before applying Vegas and Electric blue onto each respective nail.

pp blog fest 14

pp blog fest 14

I actually love the way my ring finger turned out and will be making a full manicure with this in the future!

Picture Polish will be retailing a special exclusive 4 pack ‘Nail Vinyls’ containing ‘Chevrons, Mini Chevrons, Straight & Right Angles that will be used by all participants this year! Check out more information about the vinyls here:


You can find more information about Picture Polish by clicking on the following links:

International Stockists: http://picturepolish.com.au/network

Check out the other wonderful creations by the ladies from around the world!


Thanks for dropping by!
~Sharon

Read more…

Tuesday, February 11, 2014

Shopping the Stash: P for Picture Polish

Hey ladies! I have been finding that whenever I reach for a Picture Polish to wear, I am always taken in by the beauty of Kryptonite. I can say I'm not the only one taken in by the beauty of this green polish because there are always plenty of compliments to follow ;) What can I say, Cathy and The Girls behind Picture Polish have definitely created a stunner!

kryptonite

kryptonite

kryptonite

Are you as taken in by Kryptonite as I am? :)

Thanks for dropping by.
~Sharon

Read more…

Sunday, February 9, 2014

A blue and white nail request

Hi ladies. One of my colleagues at work requested for some blue and white nails so I went along with it and came up with this skittle :)

On my pinky & index, I have two coats of OPI Can't find my Czechbook. I layered OPI Pirouette my whistle onto my index finger and took a dotting tool for the dots on my pinky. My middle finger and thumb have two coats of China Glaze Caribbean blue. On my ring finger, I applied two coats of Ulta3 Lily white and then layered two coats of Picture Polish Splash over it.

blue and white skittle

blue and white skittle

Simple, but effective - that's what I love so much about the skittle nail look :)

Thanks for reading.
~Sharon

Read more…

Wednesday, November 13, 2013

When red and black meet

Hello everyone :) I really should get my act together - my backlog of photos is starting in pile up again!

Whenever I feel the urge to pull out black nail polish to wear, I always seem to pair it with another shade - and this time is no different :P I applied two coats of Picture Polish O'Hara and then created a gradient with Ulta3 black satin on my index and pinky nails.On my middle nail, I have two coats of black satin layered with Orly Rockets red glare.

red & black

red & black

Do you wear black often? How do you prefer to wear it?

Thanks for reading!
~Sharon

Read more…

Saturday, November 9, 2013

Live, laugh, love

Hi there :) Quick post for today! I wanted to pull out Picture Polish Monroe to wear, so I paired it with some quick nail stamping.

Pinky, index & thumb: Two coats of Monroe.
Ring: Two coats of Ulta3 lily white and stamped with BM-405 and Monroe.
Middle: Two coats of Ulta3 black satin and dotted with Monroe.

live laugh love

live laugh love

What do you think of this simple double accent look? :)

Thanks for reading as always.
~Sharon

Read more…

Wednesday, September 11, 2013

Picture Polish Kryptonite

Hi everyone! I know I've already dedicated a post towards Picture Polish Kryptonite before, but how can I not wear it again and not post about it? Just look at the awesome that it is! Two perfect coats of the beauty ♥

kryptonite

kryptonite

Do you own this polish? If not, I suggest you run and get it! :D

Thanks for reading.
~Sharon

Read more…

Saturday, August 24, 2013

Blue, studs and drag marbling

Hello ladies :) Here is a quick and simple skittle look using my favourite nail art accessory at the moment - studs! ♥

Pinky: Two coats of Picture Polish Electric blue.
Ring: Two coats of Ulta3 black satin and drag marbled with OPI Dining al Frisco.
Middle: Two coats of Electric blue accessorised with studs :)
Index: Two coats of Dining al Frisco.
Thumb: Two coats of Dining al Frisco and stamped with zebra print.

blue, studs and drag marbling

blue, studs and drag marbling

blue, studs and drag marbling

Besides the failed stamping on my thumb, I quite liked the final outcome :) What do you think of it?

Thanks for reading!
~Sharon

Read more…

Monday, July 29, 2013

Picture Polish Blog Fest 2013

Celebrating the Year of the Blogger

Hi ladies :) This is a super exciting post today - I have the distinct privilege of being a part of Picture Polish's Blog Fest 2013! You may have heard of this event which went live two years ago. Basically, a bunch of bloggers post manicures of Picture Polish nail polishes at a specific time (their own time zone) all in one day. For Blog Fest 2013 however, the girls behind Picture Polish have decided on a nail art theme this year, where each nail look will feature three nail polishes from the brand.

I had the chance to showcase BombshellJealousy and Monroe so without further ado, here is the look I put together!


From the mixture of colours, I was inspired by an ocean theme and set about to put together this nail art. There is a tutorial on how I created this look towards the end of this post. But first up, here are some more photos :)

In terms of formula, I found Bombshell to be sheerer than I expected, but it was buildable and opaque by the second coat. Monroe was a little harder to work with - you really have to make sure it's dried thoroughly before applying the next coat or you will drag the coat underneath. It's a beautiful red holographic polish though, and was opaque in two coats as well. Jealousy is a glitter bomb and simply gorgeous, packed full of glitter. Completely opaque in two coats.


For the ocean look, I decided to go with some saran wrapping with Bombshell and a black polish. As an accent, I painted an 'under the sea' look complete with seaweed and fish.


I absolutely love this photo because it shows the depth in the ocean look - just how beautiful is it?! :)


Picture Polish is an Australian nail polish brand and thus based in Australia. Shipping information can be found here on the website. Every day deals is an offer redeemable only with purchase from the website. However, if you're looking for a stockist closer to home, check out the Network page as there are a range of them!

As promised above, here are two tutorials of the techniques used in this nail art look :)

Ocean tutorial:

1. Apply two coats of Bombshell and let it dry.
2. Once the base colour is dry, apply a thick coat of a black nail polish over it.
3. Working quickly, take a scrunched up cling wrap piece and dab it over the nail. This will take some of the black nail polish away and leave behind a pretty marbled look. Finish with a top coat to seal in the design!


Under the sea tutorial:

1. Apply two coats of Bombshell and let it dry.
2. Place a little bit of Jealousy onto a scrap piece of paper. Using a dotting tool, create the a seaweed design over the blue base. Let it dry.
3. Create fish outlines using a white nail polish and dotting tool. This will help the red shade 'pop' over the darker blue base.
4. Go over the white fish outlines with Monroe and a dotting tool.
5. Take the white polish and dotting tool to give the fish an eye. Seal your design with a top coat.


These are actually my first tutorials and took me ages to make :P I hope you like them!

All nail creations in Blog Fest 2013 are actually part of a contest with an award of creating a collaboration shade with Picture Polish! There are three awards, which include the following:

  • 1 x Award - as voted by PP friends and fans
  • 1 x Award - as voted by all participants of Blog Fest 2013
  • 1 x Award - as voted by Jules & Megs of Picture Polish
You will find all the participating posts on Picture Polish's Pinterest board - I personally can't wait to see all the creative manis which will be posted!

Picture Polish can be found on many social media websites including Facebook, Twitter, Pinterest, Instagram, Youtube and Google+.


Thanks for reading!
~Sharon
Products provided for consideration.

Read more…

Wednesday, May 29, 2013

Autumn inspired nails

Hi ladies~ With Autumn finally settling in now and waking up to the chill in the morning, I felt compelled to pull out some very neglected brown nail polishes in an attempt to make my nails look more chocolate-y, and hence feel warmer. If that even works :P

I applied two coats of OPI Suzi loves cowboys onto my pinky, middle and index fingers. For my middle finger, I took China Glaze OMG and a dotting tool to create the dots. On my fourth finger and thumb, I have two coats of Picture Polish Demeter.

brown skittle

Under artificial light to bring out the holo goodness :)

brown skittle

What do you tend to wear for the cooler months of the year? For the southern hemisphere ladies, has the cold hit you yet?

Thanks for reading!
~Sharon

Read more…

Saturday, May 25, 2013

Swatches and review: Picture Polish Metallic Mush

Hello everyone! I have another work appropriate and gorgeous Picture Polish to share with you today :) Here is the lovely Metallic mush, a foily, light and tan gold shade. I have actually tried swatched this three times due to my inability to capture it in all its prettiness the previous times. Here, I have applied two coats in the photos.

metallic mush

I found the formula to be an absolute breeze to work with! Despite the foil finish, there were no brush strokes during application. Plus, it's completely opaque in two coats.

metallic mush

Picture Polish Metallic mush can be purchased directly from Picture Polish and retails for $10. If you live outside of Australia, you may find resellers located in your country on the Network page.

What are some work appropriate shades you usually gravitate towards?

Thanks for reading!
~Sharon
Product provided for consideration.
Read more…

Saturday, May 18, 2013

Swatches and review: Picture Polish Antique

Hello everyone~ Have you ever felt in the mood for a work appropriate, yet sparkly shade to wear? Look no further than Picture Polish Antique! :) Antique is a dusty purple filled with silver micro glitter. I applied two coats in my photos below and that was enough to cover them up.

antique

antique

antique

antique

Antique is one of those polishes which look a little boring (hence work appropriate!) at a distance, but when you look at it closely...BAM! You're hit with the true beauty of the polish.

Picture Polish Antique can be purchased directly from Picture Polish and retails for $10. If you live outside of Australia, you may find resellers located in your country on the Network page.

Do you own any polishes similar to Antique?

Thanks for reading!
~Sharon
Product provided for consideration.

Read more…

Sunday, May 12, 2013

Swatches and review: Picture Polish Kryptonite

Hi ladies! Today I have an amazing nail polish to show you all! Ever since I first laid eyes on Picture Polish Kryptonite, it made its way to the top of my lemming list. Awhile back, I was fortunate enough to receive this pretty in the mail and I honestly haven't looked back since. There is no other green holographic nail polish which has looked this good ♥

I applied two flawless coats of Kryptonite onto my nails. This beautiful green, jelly and holgraphic nail polish was an absolute pleasure to apply. See that shine in the photos? That's not because of a top coat. Nope. It's the gorgeous polish in all its glory, on its own.

kryptonite

And if you think it looks awesome under natural lighting, just wait until you see it shine in the sun... ;)♥

kryptonite

Sunlight photos!

kryptonite

kryptonite

This is my favourite photo showcasing Kryptonite ♥ The rainbow of sparkles just doesn't ever cease to keep me entranced.

kryptonite

Picture Polish Kryptonite can be purchased directly from Picture Polish and retails for $12. If you live outside of Australia, you may find resellers located in your country on the Network page.

Do you own Kryptonite? If not, do you reckon you need it now?! ;)

Thanks for reading.
~Sharon
Product provided for consideration.
Read more…

Related Posts Plugin for WordPress, Blogger...